
Motorcycle Brake Not Building Pressure? (Try These 5 Easy Fixes!)
A few days back, I was changing the brake fluid because it was almost two years old. But, air bubbles were trapped in the hydraulic line during the process. Due to this, the brake lever became spongy and it was not building any pressure.
Is your motorcycle brake not building pressure or feeling spongy? Don’t worry, it’s a common problem that every motorcyclist faces.
In this guide, I will share with you the step-by-step process I followed to resolve the issue of the motorcycle brake not building pressure.
Table of Contents
Why My Motorcycle Brake Won’t Hold Pressure?
Your motorcycle brake is not holding pressure because air is trapped in the hydraulic fluid line, the brake hose is leaking, the brake fluid is too old, the brake caliper nut is loose, blockage in the master cylinder, or the master cylinder is faulty.
If you have replaced the brake fluid and there is no pressure on the brake lever, there is a high chance that air is trapped in the brake hose, which makes your brake lever too spongy.
Moreover, every hydraulic braking system uses different grades of hydraulic fluid. Mainly motorcycle brake system is designed for DOT 3 and DOT 4 brake fluid while some are made for DOT 5.
A wrong hydraulic fluid will also cause pressure loss and makes the braking system ineffective. So, always use the type of brake fluid that your manufacturer recommends.
How I Fixed Motorcycle Brake No Pressure Problem
In my case, the brake hose was intact and there was no other pressure leakage. Only, the air was trapped in the hydraulic line while filling and it cause no pressure build up in my brake.
Whenever I pull the lever, these air bubble gets compressed which causes pressure loss on brake calipers.
I quickly recognized the issue because I have an engineering background and read about the workings of hydraulic braking systems.
So, I bleed my motorcycle brake to remove the trapped air bubbles from the hydraulic fluid line. Here’s how I bleed my motorcycle’s front brake when braking was not effective.

You can also follow these simple steps to bleed your motorcycle brake system to remove air bubbles from the hydraulic fluid line.
- Cover the areas nearby the master cylinder to avoid spillage of brake fluid.
- Fill 90% of the master cylinder reservoir with the new brake fluid.
- Hook a transparent hose on the bleeder caliper and loosen the nut with a spanner.
- Pull and hold the brake lever and tighten the caliper nut.
- Release the brake lever.
- Again loosen the caliper nut and pull the brake lever.
- Now, tighten the nut and release the brake lever.
- Repeat this process until all air droplets are removed from the hydraulic line.
In most cases, the brake pressure gets back if you repeat Loosen-Pull-Tighten-Release three to four times. In my case, the brake pressure was back after three times.
Other Methods To Fix Motorcycle Brake No Pressure
In most cases, your motorcycle brake pressure will come back after bleeding it three to five times. For me, the pressure was back on the third attempt.
Here are some other reasons why a motorcycle brake won’t build pressure-
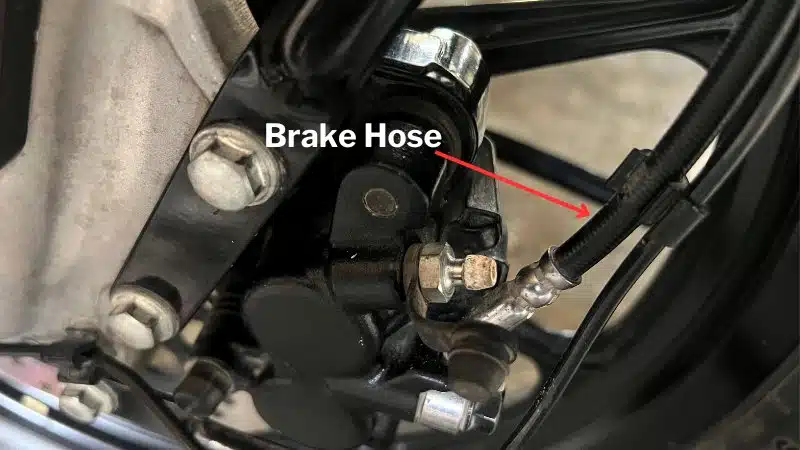
1. Replace The Brake Hose
Motorcycle brakes work on the principle of Pascal’s law. A small-diameter piston pushes the hydraulic fluid when you pull the brake lever.
Pascal’s law states that pressure applied to an incompressible fluid in a container is transmitted without change in magnitude to every direction of the fluid and container walls.
So, automobile manufacturers use the same principle in hydraulic braking systems to stop the vehicle.
But, if the brake hose (which contains brake fluid) is damaged or defective, there will be pressure loss and your brake lever will become spongy.
There is no other option than replacing the brake hose. You can buy a good quality brake hose from Amazon or any offline automobile store.
2. Change Your Brake Oil

If your brake oil is more than 2-3 years then it could be another reason for no pressure on the brake lever.
The brake oils are incompressible yet hygroscopic fluid that attracts moisture from the air. Water molecules create air bubbles which result in nonuniform pressure on the brake line.
So, if you haven’t changed your brake oil in the last 2 to 3 years, then it’s time to change it. Click here to read a detailed guide on brake oil change frequency on a motorcycle.
Refer to the user manual or check the information printed on the master cylinder to know what type of brake fluid is recommended.
3. Don’t Mix Different Brake Oil

I’m sure you heard these terms DOT 3, DOT 4, and DOT 5. These are categorizations of brake fluid and each of them has different characteristics.
DOT 3 and DOT 4 grade brake fluids are used in motorcycles, scooters, and some cars. While changing the brake fluid, ensure to empty the old brake oil from the line.
Also, don’t mix DOT 3 or DOT 4 brake oil or use engine oil as brake fluid because it will damage the rubber seals of the brake hose and your motorcycle brake will have no pressure.
Many people are mistaking the brake fluid and engine oil is same because they look quite similar. But, that’s not true.
Engine oil is a lubricant while the purpose of brake fluid is to transfer pressure to the brake pads.
I have already published a detailed guide on- can you use engine oil as brake fluid, please read that.
4. Tighten The Bleeder Nut

If your brake bleeder nut is loosened due to vibrations or any other reason, the hydraulic fluid sucks air and your motorcycle brakes won’t build pressure or the lever may feel spongy.
To fix this problem, you need to bleed your brakes. Here is how to bleed motorcycles or ATV brakes easily-
- Cover the master cylinder area with a paper towel to avoid any oil spillage on the paints.
- Unscrew the master cylinder cover and empty it with the help of a syringe.
- Clean the master cylinder with a microfiber cloth and fill the new brake fluid.
- Insert a transparent pipe into the bleeding caliper and put another end to a container.
- Loosen the bleeder nut and pull the brake lever to its dead end.
- Tighten the bleeder nut and release the brake lever.
- Again, loosen the bleeder nut and pull the brake lever.
- Repeat this process until no air bubbles come out in the transparent pipe.
Once hydraulic fluid is air free, fully tighten the bleeder nut and fill the brake fluid reservoir to the recommended level.
Now, tighten the master cylinder cover and pull and release the brake lever several times to build pressure.
5. Change The Master Cylinder
If you bled the brake and tried all the above solutions but your motorcycle brake isn’t pressurizing, it’s a sign of a faulty master cylinder.
There is a high chance that the rubber seal is broken or the piston is rusted, which causes pressure leakage.
You should replace the master cylinder to fix the no-pressure problem on your motorcycle’s brakes. You can buy a universal hydraulic brake master cylinder kit for motorcycles on Amazon.
Conclusion
Several factors including air in the brake line, loose bleeder nut, defective brake hose, and contaminated brake fluid can cause pressure loss in the front or rear brake lever.
In most cases, bleeding the brake system fixes the no-pressure problems. I have explained the step-by-step process to bleed your motorcycle brake.
I hope you found this guide helpful. Let me know if you still facing the problem.


