How Often To Replace Motorcycle Brake Pads? – (Mechanic Advice)
The braking system on any vehicle is a life savior, and you must not ignore them. Every time you pull the brake lever, the brake pads wear due to friction and heat.
After a certain period, the friction material wears, and your brakes become inoperable. You must check and replace the brake pads before it is completely worn.
Many Harley Davidson motorcycles have wear indicator grooves that indicate your brake pads need to be replaced.
But how long do motorcycle brake pads last? Generally, the motorcycle brake pads must be replaced between 10,000 to 20,000 miles. But it entirely depends on how harsh you are with the braking system. If you frequently apply the brake at high speed, the pads will wear faster and should be replaced more often.
Regularly check the grooves on brake pads and replace both pads if they are not clearly visible. If there are no grooves on the pads, you must replace them if the friction material is 1.5 to 2 millimeters or they are less than 1/8 of an inch thick.
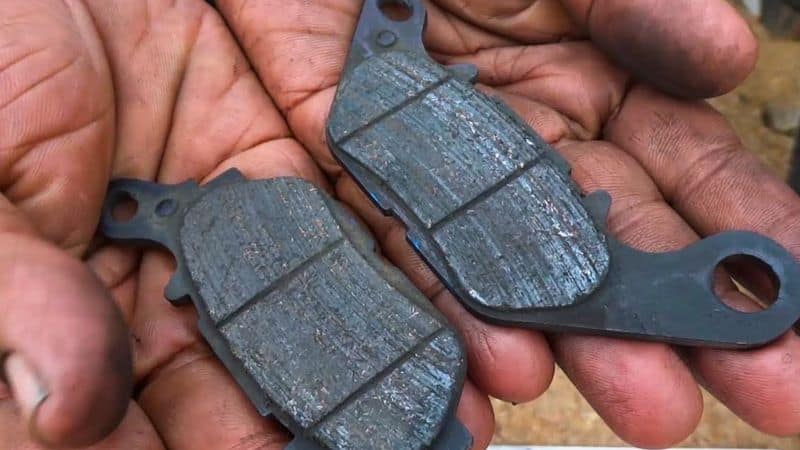
Table of Contents
How Do I Know If My Motorcycle Brake Pads Need Replacing
It’s essential to check and maintain your braking system regularly. If you notice any issue or squeaking noise from the brakes, immediately inspect both brake pads.
The brake pads must be replaced when friction material thickness is less than 1.5 to 2 millimeters or if there is any crack on it.
In most motorcycle brake pads, a groove is marked that indicates its lifespan. If the groove is completely worn out, which means it’s time to replace the brake pads.
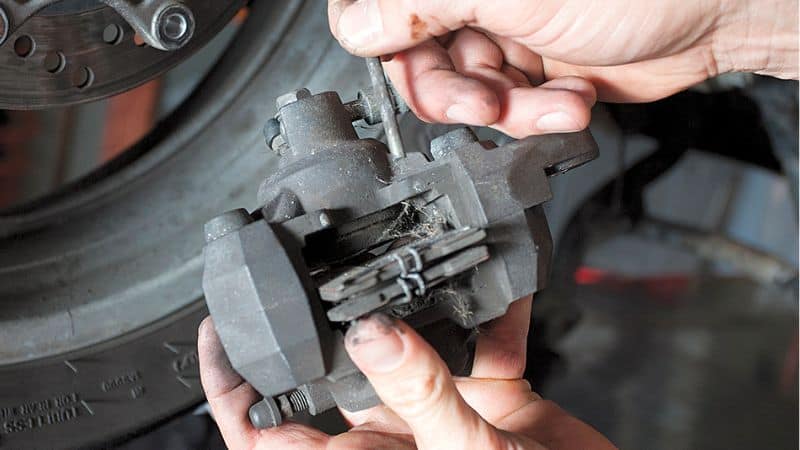
You might need to disassemble the brake caliper in some motorcycles to check the brake pad thickness.
Disassembly of motorcycle brake pads is easy, and you can do it with some basic tools. Remove the caliper locks with a nose plier and pull the pin. Next, pull out the brake pads and inspect it thoroughly.
If they’re thicker than 2.5 mm, rub the surface with 200-grade sandpaper and assemble them back.
Note– Do not press the brake lever after removing the pads because brake pistons will come out, and it will be difficult to reassemble the brake pads again.
6 Signs of Worn-out Motorcycle Brake Pads
These are some common symptoms you’ll notice when your motorcycle brake pads are worn out:
- Grinding or squeaking sound when you pull the brake lever.
- The motorcycle will take longer to stop.
- Your motorcycle brake lever feels spongy.
- Vibration when brake is applied.
- Brake pad grooves clearly not visible.
- The friction material thickness is less than 1.5 millimeters.
How To Replace Motorcycle Brake Pads
If you notice the above signs on your motorcycle, you must replace the brake pads on priority. Brake pad replacement is quite easy, and it doesn’t require any advanced tools.
Follow these steps to replace your motorcycle brake pads:
1. Remove Caliper Locks
You can either unbolt the whole caliper assembly or remove the caliper pins only. If you have never done it before, I do not advise you to unbolt the whole assembly.
With the help of a nose plier, pull out the caliper pins from both sides. After removing the locks, pull out the caliper pin that holds the brake pads.
2. Pull the Brake Pads
Once you pull the caliper pin, the brake pads will easily come out. If they do not come out, pull it by shaking a bit.
3. Scrub and Clean Everything
If you have unbolted the entire caliper, scrub and clean the whole assembly with a toothbrush. After scrubbing, clean and wipe the dirt with a cotton cloth.
If you haven’t unbolted the entire caliper assembly, you can skip this step.
4. Push the Piston Back In
The new brake pads are thick, so it’s possible that you’ll face difficulty installing them because the pistons have come out.
With the help of your fingers or old brake pads, push the piston back in so that there is sufficient gap to install the new brake pads.
5. Install New Brake Pads
Note the direction of brake pads and install them in the same way. After installing the new brake pads, attach the caliper pins and pump the brake lever to generate pressure.
If your brake lever still feels spongy, you may need to refill the fresh brake fluid. Click here to read my detailed guide on what to do when your motorcycle brake doesn’t build pressure.
Conclusion
As a mechanic, I advise you never to underestimate the importance of timely brake pad replacements for your motorcycle. Regular checks and prompt replacements are vital for safe riding. Always prioritize this aspect of bike maintenance – it’s a small effort for a huge gain in safety and performance.
